Apps

Apps

How to Post on Instagram: Mastering the Basics

To post on Instagram, open the app and tap the plus icon, then select the type of post – photo, story, reel, or live. Apply filters, add text or stickers if desired, and write a caption for your post. Starting on Instagram is easy: create an account, set a recognizable username, add a profile photo and bio, and link your account to Facebook for seamless sharing. There are four main ways to post: regular posts, stories, reels, or live videos. By following the step-by-step guides for each type, you can easily share your content on Instagram. Reposting is also an option: navigate to the desired post, click the paper airplane symbol, and share it to your story with added text, stickers, and hashtags. Getting Started With Instagram Posting To begin posting on Instagram, open the app and select the plus icon. Choose between a post, Story, Reel, or Live video. Apply filters and add captions or stickers if desired, then click share. Easily share content and engage with your audience on this platform. 1. Sign up for an Instagram account with a brand-representative username. 2. Add a profile photo, bio, and website link. 3. Link your account to Facebook and other platforms. 4. Open the Instagram app and tap the plus icon to share a post, Story, Reel, or Live. 5. Apply filters, text, or stickers as desired. 6. Write a caption and share your post. 7. To repost, navigate to the desired post, tap the plane icon, and select “Add post to your story.” 8. Customize with text, stickers, and hashtags before sharing to your story. Types Of Posts On Instagram Discover various post types on Instagram, including regular posts, Stories, Reels, and Live videos. Easily share content by selecting your preferred category and adding filters, captions, and interactive stickers. Enhance engagement with your audience through diverse Instagram posting options. Photo Upload a photo from your library or take a new one. Add a caption or location. Video Share a video post, edit it, add a caption, and post to your profile. Story Create interactive stories with text, stickers, hashtags, and elements. Reel Record and share short video clips with music, effects, and captions. Live Video Start a live broadcast, engage with viewers, and respond to comments. Step-by-step Instagram Posting Guide Posting on Instagram includes choosing the post type, adding filters and editing, writing captions and text, sharing and reposting, and utilizing interactive stickers. When posting, select the post type — post, story, reel, or live video. Apply filters or add text and interactive stickers if desired. Write a compelling caption for the post and share it. Reposting on Instagram can be done by selecting the desired post, clicking the paper airplane symbol, and adding it to your story. Customize the post with text, stickers, and hashtags before sharing it to your story. Uploading a photo involves tapping the plus icon, selecting the photo, adding a caption, and sharing it. Optimizing Instagram Profile For Posting To optimize your Instagram profile for posting, start by selecting the type of content – be it a post, Story, Reel, or Live video. Add filters, text, or stickers, and craft a captivating caption before sharing your content to engage your audience effectively. Optimizing Instagram Profile for Posting Username and Brand Representation Choose a username that represents your brand clearly. Use keywords related to your brand in your username. Keep your username short and memorable. Profile Photo and Bio Select a profile photo that is recognizable and represents your brand. Optimize your bio with relevant keywords and a clear description of your brand. Include a link to your website or any external sites you want to direct your audience to. Linking to External Sites Connect your Instagram account to your Facebook and other relevant accounts. Use the “Add post to your story” feature to share posts from other accounts. Include interactive stickers, hashtags, and text to engage your audience when sharing posts. Tap “Your Story” to share the post with your followers. New Features In Instagram Posting New Features in Instagram Posting: All-in-One Posting Update Instagram has recently introduced improved methods for posting, making it easier than ever to share content. Whether you want to post a photo, story, reel, or live video, the process is straightforward. Simply open the Instagram app and click the plus icon at the center. Choose the type of post you want to share and apply any filters or add text as desired. Write a caption for your post and you’re ready to go. For beginners, getting started on Instagram is simple. Sign up for an account, choose a username that represents your brand, and add a profile photo, biography, and website link. You can also link your account to Facebook and other sharing sites for increased visibility. When it comes to sharing someone else’s content on Instagram, the process is also easy. Simply navigate to the post, reel, or video you want to repost, click the paper airplane symbol, and select “Add post to your story.” You can then customize the post with text, stickers, hashtags, and other elements before sharing it on your own story. Instagram’s new features make posting and sharing content a seamless experience. Whether you’re a beginner or an experienced user, these updates enhance the overall posting experience. Now, you can confidently post on Instagram like a pro! Frequently Asked Questions Of How To Post On Instagram How Do You Post On Instagram Step By Step? To post on Instagram, open the app and click the plus icon. Choose the post type – post, Story, Reel, or Live. Apply filters or add text/stickers. Write a caption, and then share. How Do You Use Instagram For Beginners? To use Instagram for beginners, sign up for an account, choose a username that represents your brand, add a profile photo, biography, and website link. Link your account to Facebook and other sharing sites. Open the app, click the plus icon, choose the type of post (post,

How to Delete Snapchat
Apps

How to Delete Snapchat: The Ultimate Guide to Removing Your Account

To delete Snapchat on Android, tap your avatar, go to Settings, tap I Need Help, select Managing My Account, then tap Delete My Account. Deleting the Snapchat app on Android involves opening Google Play Store, managing apps, selecting Snapchat, and uninstalling it manually. In a world where digital footprints matter, knowing how to delete your Snapchat account is crucial. Whether for privacy concerns or a social media cleanse, removing your presence from a platform like Snapchat is a decision many users consider. By following a few simple steps, you can bid farewell to your snaps and chat history, ensuring a clean break from the platform. Let’s dive into the process of permanently removing your Snapchat account from your Android device. Credit: www.backblaze.com Step-by-step Guide To Deleting Snapchat Discover a step-by-step guide to deleting Snapchat effortlessly. Learn how to delete your account through the Snapchat app or the Snapchat Accounts Portal, ensuring your information is permanently removed. Using the Snapchat App: Open the Snapchat app, tap your avatar, go to settings, select ‘I Need Help’, then ‘Managing My Account’, and choose ‘Delete My Account’ to proceed. Using the Snapchat Account Portal: Log in to the Snapchat account portal, navigate to ‘Account Actions’, select ‘Delete Account’, input your password, and confirm the deletion to permanently remove your Snapchat account. Troubleshooting And Faqs Looking to delete your Snapchat account? Follow these simple steps: Open the Snapchat app and tap your avatar on the top-left. Then, tap the Settings icon on the top-right. Under SUPPORT, tap I Need Help and select Managing My Account. Finally, tap Delete or Reactivate My Account and follow the prompts to permanently delete your Snapchat account. Delete Snapchat on Android: Tap your avatar, go to Settings, select I Need Help, choose Managing My Account, tap Delete Account, and follow prompts. Deactivate Snapchat account on iOS: Tap the ⚙️ button, select ‘Delete Account’ in Account Actions, log in, and confirm the deactivation. Delete Messages on Snapchat: Swipe right to chats, hold the chat to delete, or press and hold a Snap in Chat to delete it. Snapchat FAQs: Deleting account FAQs, message deletion steps, deleting chat snaps, and account reactivation details are essential. Following the correct steps ensures successful deletion. Regularly updating the app can prevent deletion issues. Be cautious while deleting, as the process is irreversible. Contact support for further assistance. Remember to backup any important data before proceeding. Additional Resources For Deleting Snapchat Account When it comes to deleting your Snapchat account, there are various resources available to guide you through the process. Video tutorials can be a helpful visual aid, providing step-by-step instructions on account deletion. Platforms-specific instructions cater to the unique requirements of different devices, ensuring a seamless deletion process across all platforms. For video tutorials, you can refer to YouTube channels such as Gauging Gadgets, ElectronicsHub, and How-To Authority, which offer comprehensive guidance on deleting your Snapchat account. Additionally, platform-specific instructions are available for both Android and iOS devices, enabling users to efficiently navigate the account deletion process. Credit: www.reputationdefender.com Credit: socialhubin.com Frequently Asked Questions On How To Delete Snapchat How Do I Permanently Delete My Snapchat Account? To permanently delete your Snapchat account, open the app, tap your avatar, go to Settings, choose I Need Help and Manage My Account, then select Delete Account, confirm with your password, and tap Continue. How Do I Delete Snapchat 2023? To delete Snapchat in 2023 on Android: Go to your profile avatar, tap Settings, then I Need Help, Managing My Account, Delete Account. Why Can’t I Delete My Snapchat Account? You can’t delete your Snapchat account within the app; you must visit the website. How Can I Delete Snapchat App? To delete the Snapchat app on Android, open the Google Play Store, tap your profile icon, select “Manage apps and devices,” then “Manage. ” Choose the app and tap “Uninstall. “ Conclusion Deleting your Snapchat account is a simple process that can be done through the app or via the Snapchat accounts portal. By following the steps outlined in this guide, you can ensure that your account is permanently deactivated. For those looking to distance themselves from the platform, this is an important step in maintaining online privacy and security.

How to Delete a Tiktok Video
Apps

How to Delete a Tiktok Video: The Ultimate Guide

To delete a TikTok video, open the video, tap the three-dot menu, and select delete. Deleting a TikTok video is a straightforward process that can be done directly within the app. Whether you want to remove a video due to privacy concerns, content issues, or simply to declutter your profile, understanding how to delete a TikTok video is essential. By following a few simple steps, you can easily manage your video content on the TikTok platform. This guide will provide you with clear instructions on how to delete a TikTok video effectively, ensuring that you can maintain control over your online presence. Credit: www.descript.com Methods For Deleting Tiktok Videos To delete a Tiktok video, go to your profile and select the video you want to delete. Then, tap the three-dot icon and choose the “Delete” option. This will permanently remove the video from your account. Deleting Tiktok Videos On The App Deleting a Tiktok video on the app is a straightforward process that can be done in a few simple steps: Open the Tiktok app. Go to the video you want to delete. Tap on the three dots icon for more options. Select the “Delete” option. Deleting Tiktok Videos On The Web If you prefer to delete Tiktok videos using the web version, follow these steps: Visit Tiktok’s website and log in to your account. Go to your profile page. Find the video you want to remove and click on the delete option. Deleting Private Videos For private videos that you want to delete on Tiktok, ensure that you first change their visibility status to private before deleting: Open the Tiktok app. Find the private video you want to delete. Change the privacy settings to private. Follow the steps mentioned above to delete the video. “` In order to delete Tiktok videos, you can follow these simple steps depending on whether you are using the Tiktok app or the web version. Deleting private videos requires an additional step of changing the privacy settings before removing them permanently. Credit: www.commonsensemedia.org Best Practices For Deleting To ensure a smooth TikTok experience, follow these steps to delete a video. Firstly, navigate to the video you want to delete, then tap the three-dot icon and choose the delete option. Confirm your decision, and the video will be permanently removed from your profile. Best Practices for Deleting a Tiktok Video Ensuring Permanent Deletion Deleting a TikTok video requires special care for ensuring it’s gone forever from your profile. Avoiding Shadow Banning Prevent shadow banning by properly managing your deleted TikTok videos to maintain a positive account status. Common Questions Related To Video Deletion When it comes to managing your TikTok content, there are various questions that users commonly encounter when it comes to deleting their videos. Here are some of the frequently asked questions related to video deletion on TikTok: How To Delete A Reposted Tiktok Video If you want to delete a reposted TikTok video, you can follow these steps: Open the TikTok app and go to your profile page. Locate the reposted video that you want to delete. Tap on the video to open it. Click on the three dots icon located at the bottom right corner of the screen. From the options that appear, select “Delete” to remove the reposted video from your profile. Deleting Videos Without The Three Dots If you are unable to find the three dots icon to delete a video, you can use the following alternative method: Go to your profile and find the video you want to delete. Tap on the video to open it. Tap the arrow icon to share the video. Choose the “Save Video” option to save the video to your device. After saving, go back to your profile and select the saved video. Now, you can delete the video using the delete option that appears. Deletion On Different Devices Deleting a TikTok video may vary slightly based on the device you are using. Here are the general steps for deletion on different devices: Device Deletion Steps Mobile (iOS/Android) Open the TikTok app, go to your profile, select the video, and tap on the three dots to delete. Web Browser Visit TikTok on the web, log in to your account, go to your profile, and delete the video as per the web interface. Conclusion And Additional Tips To delete a TikTok video, simply go to the video you want to remove and tap on the three-dot icon. Select delete to remove the video from your profile. Additionally, you can deactivate your account by following the steps provided in the settings menu. Deleting unwanted TikTok videos is crucial for maintaining control over your online presence and protecting your privacy. By removing content that no longer aligns with your desired image or may pose a risk, you can ensure that your TikTok profile represents your authentic self. Importance Of Deleting Unwanted Content Deleting unwanted TikTok videos plays a significant role in maintaining a positive digital footprint. In today’s online world, where employers, colleges, and even potential partners often research individuals, it’s essential to curate your online presence. Removing videos that may contain sensitive or inappropriate content can help you avoid potential consequences in the future. Moreover, removing unwanted content gives you the opportunity to refine your TikTok profile and showcase your best and most relevant videos. By deleting irrelevant or outdated videos, you can create a streamlined profile that highlights your creativity, talent, or specific interests. Protecting Privacy While Using Tiktok TikTok’s popularity and reach mean that users need to be vigilant about protecting their privacy. Deleting unwanted videos is a vital step in safeguarding personal information. Analyze your videos regularly and delete any that reveal too much personal detail, such as your location, full name, or other identifying information. Additionally, unwanted videos may attract unwarranted attention, potentially leading to cyberbullying or harassment. By promptly deleting such content, you can prevent negative experiences and protect yourself from online threats. Furthermore, regular video curation helps you

Apps

How to Make a Reel on Instagram: A Step-by-Step Guide

To make a reel on Instagram, tap at the bottom or swipe right to access the Reel feature, then tap and hold to record a clip or tap to start and end the recording. Creating engaging and visually compelling content on Instagram is crucial for expanding your reach and connecting with your audience. One effective way to achieve this is by leveraging Instagram Reels, a feature that allows you to create short, engaging video content that is not only entertaining but also highly shareable. By utilizing the various tools such as adding music, effects, and utilizing filming tips, you can make your Reels stand out and attract more viewers. We will guide you through the process of making a Reel on Instagram, from recording and editing to posting and sharing your content. Let’s dive in and explore the exciting world of Instagram Reels! Getting Started Learn how to make a reel on Instagram without any hassle. Follow step-by-step instructions to record clips, add effects, and share your amazing reels with your followers. Get started today and showcase your creativity to the world. Recording Reels on Instagram: To start recording a reel on Instagram, tap the “Reel” option at the bottom of the screen. Hold down the record button to capture a clip or tap once to start and tap again to stop recording. Adding Effects and Music: You can enhance your reel by adding music, effects, and filters. Explore different options by tapping on the respective icons while creating your reel. Enhancing Your Reels Looking to enhance your Instagram Reels? Record or upload clips, add music, and apply effects using the Reels feature. Create engaging content for your followers with these easy-to-use editing tools. Stand out and showcase your creativity with captivating Instagram Reels. How to Make a Reel on Instagram Creating engaging Instagram Reels involves adding both music and effects to your content. Utilizing the advanced features allows for greater customization and creativity. Record your reel by tapping at the bottom or swiping right in the Feed. Tap REEL to get started, then hold to record a clip or tap to begin and end recordings. Want to elevate your reel with pictures and music? Follow the steps to select images and music or use Canva for existing videos and images in your reel. Editing And Sharing Editing Reels Within Instagram: To edit a reel within Instagram, tap the Reels at the bottom, then tap and hold to record or tap to start and tap again to end. You can also apply various editing features such as adding music and effects. Sharing Your Reels: After editing, you can easily share your reels by tapping on the Share button which allows you to post your reels to your Instagram feed for your followers to see. Additional Tools And Tips For crafting captivating Instagram reels, consider using various tools like the audio tool, speed tool, and timer tool. Enhance your content with features like the align tool and editing options to create engaging and shareable reels effortlessly. Experiment with different tools to elevate your Instagram reel game. To create engaging reels on Instagram, there are a variety of additional tools and tips that you can utilize. One such tool is the use of apps specifically designed for creating reels. Some popular apps for creating reels include CapCut, InShot – Video Editor, Filmora, KineMaster, Adobe Premiere Rush, and Video Editor. These apps offer various features and editing capabilities to enhance your reels and make them more visually appealing. In addition to using apps, there are also some general tips to keep in mind when creating reels. Firstly, make sure to capture attention-grabbing footage right from the start to hook your audience. Secondly, incorporate music and effects to add depth and interest to your reels. Lastly, experiment with different grid layouts, green screens, and other creative tools available on Instagram to make your reels stand out. By following these tips and utilizing additional tools, you can create engaging and visually appealing reels on Instagram. Frequently Asked Questions On How To Make A Reel On Instagram How Do You Make A Reel On Instagram? To make a reel on Instagram, tap the Reel option, then start recording clips by holding or tapping. How Do You Make A Reel With Pictures And Music On Instagram? To create a reel with pictures and music on Instagram, tap “Reel” in the bottom menu, then tap the camera icon to create a new reel. Next, select the Gallery icon to choose your photos. Finally, add music and customize your reel before posting it. How Do You Make A Reel On Instagram From Your Camera Roll? To make a reel on Instagram from your camera roll, follow these steps: 1. Tap the “Reels” tab in Instagram. 2. Tap the camera icon to create a new Reel. 3. Tap the Gallery icon at the bottom-left corner. 4. Select the image(s) from your camera roll. 5. Edit and customize your reel. 6. Tap “Post” to share your reel on Instagram. How Do You Make A Reel With Existing Video And Pictures? To make a reel with existing videos and pictures on Instagram, you can use different tools like Canva. Open Canva and search for “Reels” to find IG reel templates. Choose a template and upload your videos and photos. Customize your reel using Canva’s reel editor. Finally, download and share your reel on Instagram. Conclusion Instagram Reels offer a creative and engaging way to express yourself and connect with your audience. By following the steps mentioned in this post, you can easily create impressive Reels that stand out. With features like music, effects, and editing tools, the possibilities are endless. So, start experimenting and have fun with your Reels to showcase your unique personality and style on Instagram.

How to Remove My Ai on Snapchat
Apps

How to Remove My AI on Snapchat: The Ultimate Guide

To remove My AI on Snapchat, open the Chat screen, search for “My AI,” tap and hold the tile, then select “Hide.” Removing My AI on Snapchat enhances privacy and security while using the app. My AI may access shared content like location for personalized responses. AI functionalities on social media platforms like Snapchat help enhance user experience but can sometimes raise privacy concerns. By knowing how to remove or disable My AI on Snapchat, users can exercise more control over their data and interactions on the platform. This guide aims to provide a simple and effective way to manage My AI settings on Snapchat, ensuring a personalized and secure user experience. Credit: www.commonsensemedia.org Manual Method To remove My AI on Snapchat manually, open the app and swipe right to access the Chat screen. Tap the search bar and type “My AI”. Press and hold the “My AI” tile until a menu appears, then select “Hide” to remove it. Manual Method: Using Snapchat Plus to Remove My AI Unpinning My AI from Friends’ Feed To remove My AI from Snapchat, utilize Snapchat Plus. Unpin My AI from friends’ feed by following simple steps. Open Snapchat app and navigate to settings. Locate the Snapchat Plus option and proceed to remove My AI. Confirm the action to finalize the process. Ensure to follow the precise steps outlined to effectively eliminate My AI from your Snapchat experience. Enhance your user privacy and customize your app settings effortlessly. Optimize your Snapchat usage by actively managing features like My AI with convenience and ease. Alternative Methods Looking for ways to remove your AI on Snapchat? Check out tutorials on YouTube or visit tech forums like Reddit for step-by-step instructions on turning off or hiding the AI feature in the app. Alternative Methods Hide My AI using Snapchat: Turn off My AI on Snapchat by hiding it in the chat settings. Delete My AI in Snapchat: Removing My AI on Snapchat without additional tools can be done by selecting “Remove My AI” in the settings. Technical Challenges Technical Challenges: When it comes to removing My AI on Snapchat, users often face technical challenges. Snapchat’s instructions may not always work as expected, leading to frustration. Moreover, users have reported various issues with My AI removal on Reddit. This includes difficulty in accessing the chat settings and the My AI banner on the app. Additionally, some users have experienced persistent My AI presence despite following Snapchat’s guidelines. Finding a reliable solution to remove My AI remains a common concern among Snapchat users. Credit: www.fresherslive.com Credit: biglysales.com Frequently Asked Questions On How To Remove My Ai On Snapchat Can I Get Rid Of My Ai On Snapchat? Yes, you can remove AI on Snapchat. Open chat screen, type “My AI,” long tap on the AI tile, and select “Hide. “ How Do I Unpin My Ai On Snapchat? To unpin your AI on Snapchat, swipe right to Chat, press and hold My AI, tap on Chat Settings, then Clear from Chat. Why Does Snapchat Have My Ai? Snapchat utilizes your AI to enhance user experience by providing personalized responses and improving product offerings based on shared data like location. How Do I Get Rid Of Snapchat Ai On Reddit? To remove Snapchat AI on Reddit, open Snapchat, swipe right to the Chat screen, search for “My AI,” hold the tile, and select “Hide. “ Conclusion To successfully remove My AI on Snapchat, there are various methods available. From utilizing Snapchat Plus to simple toggling in settings, the process is relatively simple. By following these steps, you can ensure that your AI is removed, and you can enjoy a more private Snapchat experience. Say goodbye to My AI and take control of your privacy today.

How to Unrepost on Tiktok
Apps

How to Unrepost on Tiktok: A Step-by-Step Guide

To unrepost on TikTok, tap the arrow icon on the video, then select “Remove repost.” TikTok users often find themselves in situations where they accidentally repost a video which they didn’t intend to share. Thankfully, there is a simple solution to this problem. By following a few quick steps, you can easily unrepost a video on TikTok. Whether it’s a matter of deleting a reposted video or avoiding the repost altogether, knowing how to undo a repost can save you from embarrassing moments on the popular social media platform. Let’s delve into the easy process of unreposting on TikTok to maintain a clean and curated video feed. Identifying Reposted Content Locating Reposted Videos In TikTok, identifying reposted content starts with locating the videos that have been reposted without authorization. Understanding Reposting Notification When a video is reposted on TikTok, users often receive a notification alerting them of the repost. Understanding this notification is crucial in identifying the reposted content. Credit: m.youtube.com Methods To Unrepost To Unrepost on TikTok, open the video you want to remove repost from and tap the arrow icon in the bottom-right corner. Then, select the “Remove repost” option in the top-left corner of the menu. Using Tiktok App Features To unpost a video on TikTok using the app, follow these steps: Select the video you want to unrepost. Tap the Share (right-arrow) icon. Click on Remove Repost. Alternative Techniques If the above method doesn’t work, consider alternative ways: Tap the search icon and find the video you want to undo repost. Enter relevant keywords to locate the video. Click on the share menu and press the ‘Remove Repost’ option. Preventing Accidental Reposting Accidental reposting on TikTok can be a common occurrence, but there are measures you can take to prevent it. Whether it’s disabling the repost feature or verifying before sharing, being proactive can save you from the hassle of undoing a repost. Let’s explore some preventative steps to ensure you don’t unintentionally repost on TikTok. Disabling Repost Feature One way to prevent accidental reposting on TikTok is by disabling the repost feature. By doing so, you eliminate the risk of mistakenly sharing content that you didn’t intend to. Disabling this feature can provide an extra layer of security, giving you peace of mind knowing that you won’t inadvertently repost a video. Verifying Before Sharing Another effective method for preventing accidental reposting is to always verify the content before sharing. Taking a moment to thoroughly check the video you intend to share can help you avoid any mishaps. Whether it’s double-checking the video’s details or confirming the intended action, this simple step can help reduce the likelihood of an unintentional repost. Credit: kahawatungu.com Credit: medium.com Frequently Asked Questions Of How To Unrepost On Tiktok How Do I Undo A Reposted Tiktok? To undo a reposted TikTok video, follow these steps: 1. Open TikTok and find the reposted video. 2. Tap on the share button (the arrow icon) in the bottom-right corner. 3. Look for the option “Remove repost” and tap on it. 4. The reposted video will be successfully undone. Can I Unrepost A Video On Tiktok? Yes, you can unrepost a video on TikTok. Open the video and tap the arrow icon. Then, tap “Remove repost” from the menu. What To Do If You Accidentally Report Someone On Tiktok? To undo a repost on TikTok, open the video, tap the share arrow, and select “Remove Repost” option. Why Can’t I Remove My Repost On Tiktok? You can’t remove a repost on TikTok because the platform doesn’t offer that feature. Conclusion Learning how to unrepost on TikTok allows you to manage your content more effectively. By following the steps outlined you can easily remove any unintentional reposts and maintain a clean and organized profile. With this knowledge, you can confidently navigate the platform and create a seamless experience for your audience.

Apps

How to Use Instagram: Mastering the Basics

To use Instagram, open the app and click the plus icon to share a post, Story, Reel, or Live. Add filters, text, stickers, and caption as desired for your content. Instagram is a popular photo and video sharing app where users engage with posts from friends and followers while also sharing their content. With strategic content planning, engaging Reels, boosting posts, and tracking insights, users can effectively maximize their Instagram presence. It’s essential to adhere to community guidelines by sharing only appropriate and original content while fostering genuine interactions within the platform. Whether using Instagram for personal use or business promotion, these practices can help users make the most of their Instagram experience and reach a broader audience efficiently. Understanding Instagram Instagram is a powerful platform for sharing photos and videos with a wide audience. To use Instagram effectively, open the app and select the type of post you want to share, such as a regular post, Story, Reel, or Live. You can customize your posts with filters, text, and interactive stickers to engage your followers. Additionally, staying organized with a content calendar and utilizing timesaving tools can help you make the most of your Instagram presence. Instagram is a photo and video sharing app on iPhone and Android. Users can upload content, engage with followers, and explore posts. Key features include posts, Stories, Reels, and Live videos. Effective use involves a content calendar, Reels entertainment, and post insights. Adherence to community guidelines ensures appropriate and respectful content sharing. Getting Started On Instagram To use Instagram effectively, start by opening the app and tapping the plus icon to post, share a Story, Reel, or go Live. Enhance your content with filters, text, and stickers before adding a caption. Stay engaged with your audience and track post performance with Insights. To use Instagram effectively, open the app and click the plus icon. Select post, Story, Reel, or Live. Apply filters or text. Add a caption. Utilize timesaving tools, a content calendar, and Insights. Follow community guidelines, respecting others. Share only own photos or videos. Foster genuine interactions and comply with the law. Reach more people through boosted posts. Stay organized and entertain with Reels. Using Instagram Effectively When using Instagram, it is important to share content regularly to keep your audience engaged. Utilize the various post options such as regular posts, Stories, Reels, and Live videos. Add filters, text, or stickers to enhance your posts. Don’t forget to write captions that resonate with your audience to increase engagement. In addition, take advantage of Insights to track the success of your posts and understand your audience better. Following the platform’s community guidelines is crucial to maintain a positive and respectful presence. By staying organized with a content calendar and utilizing tools like Reels, boosting posts, and tracking Insights, you can effectively use Instagram to grow your presence and engage with your audience. Basic Rules Of Instagram How to Use Instagram Share only photos and videos that you’ve taken or have the right to share. Post photos and videos that are appropriate for a diverse audience. Foster meaningful and genuine interactions. Follow the law. Respect other members of the Instagram community. Use timesaving tools and helpful tips to make the most of each Reel and photo you post. Stay organized with a content calendar. Entertain your audience using Reels. Reach more people when you boost a post. Track post success with Insights. Mastering Instagram Features How to use Instagram for beginners? Open your Instagram app and click the plus icon at the center. Choose the kind of post you want to share — post, Story, Reel, or Live. Apply any filters to your post or add any text or interactive stickers on your Stories if you wish. Write a caption for your post. What is the main purpose of Instagram? Instagram is a free photo and video sharing app available on iPhone and Android. People can upload photos or videos to our service and share them with their followers or with a select group of friends. They can also view, comment and like posts shared by their friends on Instagram. How do you use Instagram effectively? Use timesaving tools and helpful tips to make the most of each Reel and photo you post. Stay organised with a content calendar. Entertain your audience using Reels. Reach more people when you boost a post. Track post success with Insights. What are the basic rules of Instagram? Share only photos and videos that you’ve taken or have the right to share. Post photos and videos that are appropriate for a diverse audience. Foster meaningful and genuine interactions. Follow the law. Respect other members of the Instagram community. Frequently Asked Questions For How To Use Instagram How To Use Instagram For Beginners? To use Instagram for beginners, open the app, click the plus icon, choose post type, apply filters, add text or stickers, caption, and share your content. What Is The Main Purpose Of Instagram? The main purpose of Instagram is to share photos and videos with followers and friends. It’s a free app for iPhone and Android. Users can view, like, and comment on posts shared by others. How Do You Use Instagram Effectively? To use Instagram effectively, open the app and click the plus icon at the center. Choose the type of post you want to share – post, story, reel, or live. Apply filters or add text/stickers if desired. Write a caption for your post and use timesaving tools like a content calendar. Entertain your audience with reels, boost posts to reach more people, and track post success with insights. Follow Instagram’s community guidelines to foster meaningful interactions and respect others. What Are The Basic Rules Of Instagram? The basic rules of Instagram are as follows: 1. Share only photos and videos that you’ve taken or have the right to share. 2. Post content that is appropriate for a diverse audience. 3. Foster meaningful and genuine interactions. 4. Follow the law. 5. Respect

How to Tell If Someone Unadded You on Snapchat
Apps

How to Tell If Someone Unadded You on Snapchat: Find Out Now!

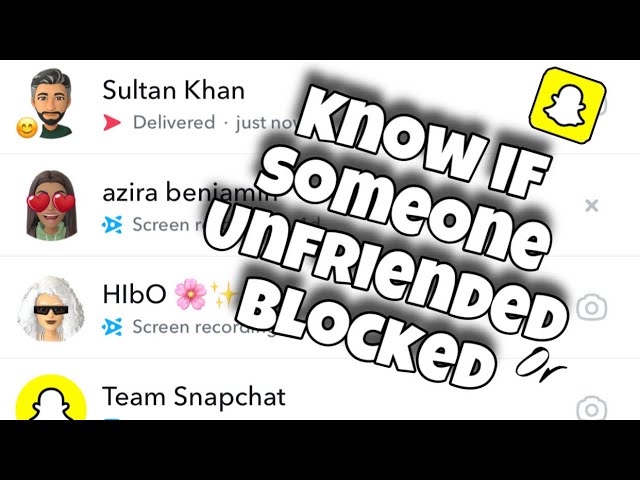
To check if someone unadded you on Snapchat, go to your Friends list and search for their username. If it’s not there, they’ve unfriended you. Knowing if someone unadded you on Snapchat involves checking your Friends list for the missing username – if it’s not there, they’ve unfriended you. Various clues can help you confirm if someone has removed you, such as a disappearing Snap score or a change in the chat window options. These small indicators can give you insights into your Snapchat connections and help you manage your social circle effectively. Recognizing If Someone Unadded You On Snapchat To determine if someone unadded you on Snapchat, open the app and tap the profile icon. Scroll down to ‘My Friends’ and look for the person’s username. If their name isn’t in the list, they’ve unfriended you. Additionally, you can check their Snap Score; if it’s no longer visible, they’ve removed you from their friend list. Recognizing if someone unadded you on Snapchat Check your friends list by tapping on the profile icon, then ‘My Friends’. Observe changes in snap score; if it’s not visible, you’ve been removed. Credit: www.remote.tools Methods For Identifying If Someone Unfriended You On Snapchat To find out if someone unfriended you on Snapchat, tap the profile icon, select ‘My Friends,’ and search for their username. If their name is not on the list, they have removed you. Another indicator is if their Snap Score is no longer visible on their profile. To see if someone unfriended you on Snapchat, navigate to your friends list and search for their username. If it’s missing, they deleted you. Alternatively, check the chat window by clicking the user’s name. If you see a blue ‘Add’ button, they’ve unfriended you. Another method is to use the search feature. Type the person’s name; if it’s not visible, they’ve likely unfriended you. Additional Indicators Of Being Unadded On Snapchat When it comes to detecting if someone unadded you on Snapchat, there are additional indicators to consider. One important sign is the inability to view the snap score of the person in question. If their snap score is no longer visible, it could signify that they have removed you from their friend list. Another method of determining if someone unadded you is by consulting community forums or conducting online searches to explore various experiences and insights shared by other users. These platforms can provide valuable information and potential clues to help you identify if someone has unadded you on Snapchat. Dealing With Being Unadded On Snapchat If you want to know if someone has unadded you on Snapchat, there are a few things you can try. First, open Snapchat and tap the profile icon on the camera screen. Scroll down and tap ‘My Friends’ to see a list of all current friends. Scroll or search for their username. If their name doesn’t appear in the list anymore, they’ve unfriended you. To further confirm it, you can also check their Snap Score. You can only see a person’s snap score when you’re friends with them. You can check your friend’s Snap score directly from their profile. If it’s no longer visible, then that means they’ve removed you from their friend list. Another way to check is through the chat window. Open Snapchat and tap on the Chat icon in the bottom navigation bar to open your chat list. Click on the name of the user you think unfriended you. Check the upper-right corner for the available buttons. If the person unfriended you, you’ll see a blue Add button. It’s important to note that being unfriended is different from being blocked. If someone has blocked you, you won’t be able to find their username at all. So, if you can still see their username but can’t add them back, chances are they just unfriended you. Faqs About Being Unadded On Snapchat How to Tell If Someone Unadded You on Snapchat To find out if someone has unfriended you on Snapchat, follow these steps: Open Snapchat and tap the profile icon on the camera screen. Scroll down and tap ‘My Friends’ to see a list of all current friends. Scroll or search for their username. If their name doesn’t appear in the list, they’ve unfriended you. If you want to check if someone has removed you without snapping them, you can check their Snap Score. Here’s how: You can only see a person’s snap score when you’re friends with them. Check your friend’s Snap score directly from their profile. If it’s no longer visible, then that means they’ve removed you from their friend list. When someone removes you as a friend on Snapchat, you may notice a change in the chat window: Open Snapchat and tap the Chat icon in the bottom navigation bar to open your chat list. Click the name of the user you think unfriended you. Check the upper-right corner for the available buttons. If the person unfriended you, you’ll see a blue Add button. Knowing if someone has unfriended or blocked you on Snapchat can be important for keeping track of your friends on the app. Credit: m.youtube.com Credit: www.remote.tools Frequently Asked Questions Of How To Tell If Someone Unadded You On Snapchat How Do You Know If Someone Has Unfriended You On Snapchat? To check if someone unfriended you on Snapchat, open the app and tap your profile icon. Scroll to “My Friends” list. If their name is missing, they’ve unfriended you. How To Tell If Someone Unadded You On Snapchat Without Snapping Them? To tell if someone unadded you on Snapchat without snapping them, go to your friends list. If their username is not there, they have unfriended you. Additionally, you can check their snap score or chat window for confirmation. What Does It Look Like When Someone Removes You As A Friend On Snapchat? When someone removes you as a friend on Snapchat, you will see a red arrow under their name. If you refresh the page and

Apps

How to Delete a Tiktok Account: A Step-by-Step Guide

To delete your TikTok account permanently, go to Settings and Privacy, select Account, then Delete account permanently. Choose a reason and confirm the deletion. With over one billion active users, TikTok has become one of the most popular social media platforms worldwide. However, there may come a time when you decide to delete your TikTok account for personal reasons. Whether you’re looking to take a break from social media or want to close your account permanently, knowing how to delete your TikTok account is essential. In this guide, we will walk you through the steps to successfully deactivate or delete your TikTok account, ensuring your data privacy and security. Let’s explore the easy-to-follow process of removing your presence from the trendy video-sharing platform. Credit: m.economictimes.com Step 1: Accessing Account Settings To start the process of deleting your TikTok account, you first need to access your account settings. This can be done within the TikTok app with a few simple steps. Open Tiktok App Firstly, open the TikTok app on your mobile device. Look for the familiar TikTok logo and tap on it to launch the app. Navigate To Account Settings Once you have opened the app, navigate to the account settings section. You can usually find this by tapping on your profile icon, which is typically located in the bottom right corner of the screen. Credit: m.economictimes.com Step 2: Deleting The Account To delete your TikTok account, follow these steps: Select Deactivate Or Delete Tap Settings and Privacy Choose Account Select Deactivate or delete account Choose Delete Permanently Confirm the action Provide Reason for Leaving Tap Continue If you encounter any issues, ensure your contact information is verified. Step 3: Confirming Deletion Data Download Notification After selecting “Delete account permanently,” TikTok will send a notification to let you know your data is being prepared for download. This is an essential step in ensuring you have access to any information stored on your account before it is permanently removed. Final Confirmation Once you have received the data download notification, TikTok will ask for final confirmation before deleting your account. This serves as the last opportunity to reconsider and ensures that the deletion is intentional, as it cannot be undone once completed. Credit: www.wikihow.com Frequently Asked Questions For How To Delete A Tiktok Account How Do You Permanently Delete A Tiktok Account? To permanently delete your TikTok account, go to Settings and Privacy, choose Account, then select Deactivate or delete account. Choose Delete account permanently and state your reason for leaving. Confirm the data download notification, then tap Continue. Why Won T Tiktok Let Me Delete My Account? To delete your TikTok account, go to Settings and Privacy in your account, choose Account, then select Deactivate or delete account. Follow the prompt to delete your account permanently. Ensure you have provided and verified your contact information before attempting to delete your account. Can I Delete My Tiktok Account And Start Over? Yes, you can delete your TikTok account and start over. Go to settings, choose Account, then select Delete account permanently. Confirm your reason for leaving and your data download notification. Then, tap continue. How Do I Delete A Second Tiktok Account? To delete a second TikTok account, go to Settings and Privacy, choose Account, then select Delete account permanently. Conclusion If you’re considering leaving TikTok, deleting your account is a straightforward process. By following the steps outlined in this guide, you can easily remove your account permanently. Remember to download your data before deletion and consider reactivating your account if needed. Thank you for reading our comprehensive guide!

Apps

How to Clear Instagram Cache: Quick and Easy Steps

To clear Instagram cache on iPhone, open Settings, find Instagram in storage, and tap “Clear Cache”. Clearing data will log you out and delete saved searches. In the fast-paced digital world, Instagram has become a vital platform for individuals and businesses to connect, share content, and engage with their audience. As users navigate through the app, Instagram cache can accumulate, taking up unnecessary space on their device and potentially slowing down the app’s performance. Clearing the Instagram cache on your iPhone can help improve app performance and free up storage space. In this guide, we will explore the simple steps to clear the Instagram cache on your iPhone efficiently and effectively. Clearing Instagram Cache On Iphone Need to clear Instagram cache on your iPhone? Follow these easy steps for a quick solution: Open Settings, select General, tap iPhone Storage, find Instagram, and click “Offload App. ” Reinstall Instagram and voila! Cache cleared and your app performance boosted. Clearing Instagram Cache on iPhone: Clearing cache helps improve app performance. Locate “Instagram” in the app settings. Tap on “Clear cache” to remove temporary data. Clear search history within the Instagram app. Offload the app to free up device storage. Reinstall Instagram for a fresh start if needed. Clearing Instagram Cache On Android To clear Instagram cache on Android, find “Instagram” in your installed apps list, tap on it, then select “Storage” or “Storage & cache” and tap “Clear cache. ” This will remove temporary files and free up space on your device, helping to improve app performance. Clearing Instagram Cache on Android Locating Instagram in Installed Apps Clearing Cache and Storage Look for Instagram in the list of installed apps and tap on it. In the App Info screen, you will find various options. Tap on “Storage” or “Storage & cache.” On the next screen, you will see two options: “Clear cache” and “Clear storage” or “Clear data.” Tap on “Clear cache.” If you clear data on Instagram, you will be logged out and need to re-enter credentials. Deleting downloaded media from your profile can also free up space. Effects Of Clearing Instagram Cache Logging Out: Clearing Instagram cache will log you out of the app, requiring you to re-enter your login credentials to access it again. This action ensures the removal of any saved searches, downloaded data, and drafts within the app. It’s a crucial step to contemplate before proceeding, considering the irreversible nature of this process. Removing Saved Data: Clearing the cache also ensures the elimination of any saved data within the app. This includes downloaded media, profiles, or any other content stored within Instagram. It provides a way to free up storage space on your device and maintain the app’s performance efficiency. Tips For Managing Instagram Storage To manage Instagram storage efficiently, clear the cache regularly on your device. Navigate to the Instagram app settings, tap on “Storage,” and select “Clear cache” to free up space and enhance performance. Regular cache clearance can help prevent storage overload on your phone. Tips for Managing Instagram Storage Clearing Cache To clear the cache on Instagram, go to your phone’s “Settings” and find “Apps” or “Apps and notifications”. Scroll down and find “Instagram” in the list of installed apps. Tap on it and select “Storage”. From there, you can tap on “Clear cache”. This will remove temporary files and images stored in the app, freeing up storage space. Deleting Downloaded Media If you have a lot of downloaded photos and videos in your Instagram app, deleting them can also help free up space. Open the Instagram app, go to your profile page, and find the downloaded media. You can select and delete them to clear storage. Taking these steps will help you manage your Instagram storage effectively and improve the performance of the app. Frequently Asked Questions For How To Clear Instagram Cache How Do I Clear My Cache On Instagram App? To clear Instagram cache on the app: – Open Settings on your Android device. – Tap on Apps or Apps and notifications. – Find Instagram, tap on it. – Tap Storage, then Clear cache. How Do I Clear My Cache On My Iphone? To clear your cache on your iPhone: 1. Open “Settings” then tap “Safari. ” 2. Select “Clear History and Website Data. ” 3. Tap “Clear History and Data” to confirm. 4. Alternatively, for specific apps, go to “Settings,” select the app, and tap “Clear Cache. “ What Happens If I Clear Data On Instagram? Clearing data on Instagram will log you out of the app and remove saved searches, downloaded data, and drafts. You will need to re-enter your login details to use the app again. Be sure you want to clear data as it cannot be undone. How Do I Stop Instagram From Using So Much Storage? To stop Instagram from using too much storage, follow these steps: 1. On an Android device, go to Settings > Apps > Instagram > Storage > Clear cache. 2. Delete downloaded media from the Instagram app to free up space. 3. On an iPhone, open the Safari app, tap , then tap Clear to clear browsing history. 4. Clearing data on Instagram will log you out and remove saved searches, downloaded data, and drafts. 5. You can also visit www. instagram. com > Privacy and Security > View Account Data > View all under Search History to clear cache. Conclusion Regularly clearing your Instagram cache can help speed up the app’s performance and free up storage space on your device. With easy steps for both iPhone and Android users, managing your cache effectively can enhance your Instagram experience and streamline your digital activities. Stay updated and optimize your Instagram use effortlessly.

How to Delete Snapchat Account
Apps

How to Delete Snapchat Account: Step-by-Step Guide

To delete your Snapchat account, log in to the accounts portal, tap ‘Delete My Account,’ input your password, and confirm. Deleting your Snapchat account can be a straightforward process if you follow these steps. First, log in to the Snapchat accounts portal. Then, tap on ‘Delete My Account,’ enter your password, and confirm the account deactivation or deletion. Alternatively, within the Snapchat app on Android, tap your avatar, go to Settings, select ‘I Need Help,’ then ‘Managing My Account,’ and choose ‘Delete or Reactivate My Account. ‘ Confirm by tapping ‘How do I delete my Snapchat account? ‘ Deleting your account will remove all your data permanently, so make sure you are certain about this decision. Credit: www.indiatoday.in Step-by-step Guide To delete your Snapchat account, access the Snapchat account portal. To delete via the app: Tap your avatar, go to Settings, and then to ‘Manage My Account’. Select ‘Delete or Reactivate My Account’ and tap ‘How do I delete my Snapchat account’. Confirm deletion by entering your password and tapping ‘Continue’. To restore, simply log in again. Technical Assistance To delete your Snapchat account, go to your profile, tap the gear icon, select “Delete My Account,” enter your password, and confirm to deactivate or delete your account. Delete Snapchat Account on Android: 1. Open the Snapchat app. 2. Tap your avatar on the top-left. 3. Tap the Settings icon on the top-right. 4. Under SUPPORT, tap I Need Help. 5. Select Managing My Account. 6. Choose Delete or Reactivate My Account. Common Issues: 1. Sometimes users face difficulties in deleting their accounts. 2. Ensure you follow the steps correctly. 3. Contact Snapchat support for further assistance. Other Platforms: 1. You can also delete your Snapchat account on iOS devices. 2. Access the Snapchat app and follow similar steps as for Android. 3. Consider taking backup of your data before deleting your account. Account Privacy Delete Snapchat Account: Deleting your Snapchat account is a straightforward process. Once you delete your account, all your data will be permanently removed from Snapchat’s servers. After entering your username and password, confirm that you are not a robot and click submit to permanently delete your account. It’s essential to consider the long-term impact of your decision, as data retrieval after account deletion is not possible. Additionally, ensure that you are aware of the security concerns and take necessary steps to safeguard your privacy before proceeding with the deletion process. Data Retrieval Process: Retrieving your data after you have deleted your Snapchat account is not feasible. Therefore, it’s crucial to consider backing up any essential information and conversations before proceeding with the deletion. Once the account is deleted, it is challenging to recover any data that was previously associated with your account. Security Concerns: Before deleting your account, ensure that your privacy and security settings are up to date. It’s essential to review who has access to your account and take necessary measures to protect your data. Additionally, consider revoking any third-party app permissions linked to your Snapchat account to enhance security. Long-Term Impact of Deletion: Deleting your Snapchat account permanently removes all data associated with it. It’s vital to consider the long-term effects of this decision and ensure that you have backed up any crucial information before initiating the deletion process. Once the account is deleted, it cannot be recovered, so consider the implications before proceeding. Credit: m.economictimes.com Credit: pricebaba.com Frequently Asked Questions For How To Delete Snapchat Account How Can I Permanently Delete My Account On Snapchat? To permanently delete your Snapchat account, follow these steps: 1. Log in to the Snapchat accounts portal. 2. Tap ‘Delete My Account’. 3. Input your password. 4. Tap ‘Continue’ to confirm account deactivation/deletion. Alternatively, on the Snapchat app: 1. Tap your avatar on the top-left. 2. Tap the Settings icon on the top-right. 3. Under SUPPORT, tap I Need Help. 4. Tap Managing My Account. 5. Tap Delete or Reactivate My Account. 6. Tap How do I delete my Snapchat account? That’s it! How Do I Delete Snapchat 2023? To delete Snapchat in 2023, follow these steps: – Open the Snapchat app and tap your avatar on the top-left. – Tap the Settings icon on the top-right, select “I Need Help” under SUPPORT. – Tap “Delete or Reactivate My Account” and follow the prompts to confirm deletion. Why Can’t I Delete My Snapchat Account? To delete your Snapchat account, log in to the Accounts Portal, tap “Delete My Account,” enter password, and confirm the deletion. How Do You Delete Snapchat For Free? To delete Snapchat for free, log in to the Snapchat account portal, tap ‘Delete My Account’ and follow the prompts. Conclusion If you’re thinking about removing your Snapchat account, these steps will guide you through the process. Once deleted, your account will be permanently removed, along with all your data. It’s essential to consider the consequences before taking this step. However, if you’re sure, follow these simple instructions to delete your account.

How to Un Repost on Tiktok
Apps

How to Un Repost on Tiktok: The Ultimate Guide

To un-repost on TikTok, open the video you want to remove from reposts. Tap the share arrow and select “Remove Repost.” If you wish to undo a repost on TikTok, follow these quick steps. Removing a repost is as simple as tapping the share button on the right side of the video and selecting the ‘Remove repost’ option. By understanding how to navigate these functions, you can easily manage your reposts on TikTok without any hassle. Keep reading to find out more about efficiently handling reposts on the popular social media platform. Credit: www.dashhudson.com How To Un-repost On Tiktok Have you accidentally reposted a video on TikTok and now wondering how to undo it? Removing a repost on TikTok may seem tricky at first, but with the right steps, you can easily un-repost a video. Follow along as we guide you through the process of un-reposting on TikTok. Check Your Profile Start by navigating to your TikTok profile. Look for the section that displays all your posted videos, including the ones you have reposted. This section typically features an icon with two arrows, one pointing up and the other down, indicating reposted content. Finding The Reposted Video Within the reposted video section of your profile, locate the specific video that you wish to un-repost. Take note of the video and prepare to remove it from your profile. Removing The Repost To un-repost a video on TikTok, select the reposted video that you want to delete. Look for the option to remove the repost, typically denoted by an arrow icon or a specific command such as “Remove Repost.” Confirm the action to remove the video from your profile. Quickest Way To Remove All Reposts If you want to remove all your reposted videos at once, consider using the bulk removal feature on TikTok. This option allows you to select multiple reposted videos and delete them simultaneously, saving you time and effort. Specific Scenarios: Iphone And Android Users For iPhone users: Access your profile, locate the reposted video, and use the ‘Remove Repost’ option to delete it. Android users: Follow a similar process on your TikTok app, find the reposted video, and remove it using the designated command. Credit: vizard.ai Common Issues And Queries If you’re wondering how to un-repost on TikTok, it’s as simple as following a few steps. First, go to your profile and find the section with the repost icon. Once you select that section, you’ll see all the posts you’ve reposted. From there, you can easily remove any unwanted reposts. Why Can’t I Remove A Repost? Some TikTok users may face difficulties removing a repost due to privacy settings or the repost feature not being available on certain types of content. Finding Reposts On Tiktok To find the reposts you’ve made on TikTok, navigate to your profile and look for the section with the icon featuring two arrows – one pointing up and the other down. This symbol represents the reposts you’ve shared on the platform. How Long Do Reposts Last? Reposts on TikTok typically remain visible on your profile until you manually remove them. However, the duration of reposts can vary based on platform updates and user settings. Additional Tips And Tricks Here are some additional tips and tricks to further enhance your TikTok experience and manage reposts effectively. Hiding Reposts On Tiktok To hide a repost on TikTok, you can consider creating a private account where only selected followers can view your reposted videos. Another option is to use the privacy settings in your account to restrict who can see your reposts, ensuring that only your desired audience has access to these reposted contents. Removing The Repost Button If you are concerned about the repost button being visible on your content, you can explore the option to disable the repost feature entirely from your videos. By turning off the repost button, you can have better control over the distribution and sharing of your original content on TikTok. Reposting On Tiktok When reposting on TikTok, it is essential to respect the original creator and give credit where it is due. Always ensure that you are following the community guidelines and properly attributing the source of the content you are reposting. Utilize the “Repost” feature responsibly to support the creators and maintain a positive TikTok environment. The Undo Repost Feature If you have accidentally reposted a video or have changed your mind about a particular repost, TikTok offers an “Undo Repost” feature. This feature allows you to easily remove your reposted content, ensuring that only the content you genuinely want to share remains on your profile. To undo a repost, simply open the video you want to remove from your reposts, select the share arrow in the bottom right-hand corner, and then choose the option to remove the repost. Credit: paperbell.com Community Support And Resources When it comes to navigating the world of TikTok and learning how to un-repost a video, it can be helpful to rely on the support and resources provided by the community. There are a few platforms where you can turn to for assistance and answers to your TikTok-related queries. Reddit Communities For Assistance If you’re looking for a place to connect with other TikTok users and seek assistance, Reddit communities can be a valuable resource. These communities have dedicated threads where you can post your questions or concerns about un-reposting on TikTok. The following Reddit communities are particularly helpful: r/TikTokHelp: This community focuses on providing assistance and support for all TikTok-related queries, including un-reposting videos. r/TikTok: While this community is more general, it has a large user base that can help answer your questions about un-reposting on TikTok. Tiktok-related Queries On Quora Quora is another platform where you can find helpful resources and answers to your questions about un-reposting on TikTok. Many TikTok users and experts frequently engage on Quora, providing valuable insights and solutions. Visit the following Quora threads to find answers to your TikTok-related queries: TikTok app topic on Quora:

Scroll to Top