How To Clean iPhone Charging Port At Home: Easy & Effective Methods
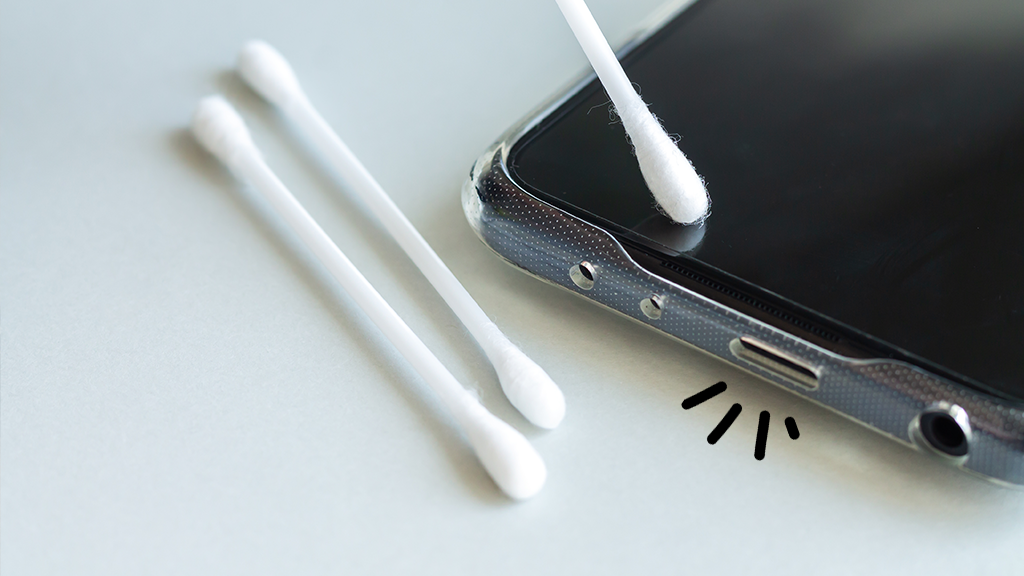
To clean an iPhone charging port at home, use a cotton swab dipped in rubbing alcohol to gently remove dirt without pushing it further inside. Avoid making the cotton swab too wet. Maintaining a clean iPhone charging port is essential for optimal functionality. If you encounter charging issues, a dirty port may be the culprit. Here, we explore simple yet effective methods to clean your iPhone charging port at home. By following these steps, you can ensure your device charges properly and prolong its lifespan. Let’s delve into the easy guide to maintaining a clean charging port and loudspeaker on your iPhone. Credit: www.amazon.com Identifying The Problem To clean the iPhone charging port at home, use a toothpick or a small brush to gently remove debris. Avoid using liquids like water or alcohol and be cautious not to cause any damage. If debris persists, consider using a can of compressed air for a thorough clean. Identifying the Problem: It’s essential to recognize the signs of a dirty iPhone Charging Port before attempting to clean it. Potential damage may occur if the port is left uncleaned, leading to charging issues and even permanent damage. To prevent this, regularly inspect your charging port for any accumulated debris or dust. Methods For Cleaning Using Rubbing Alcohol and Cotton Swab: Clean the port with rubbing alcohol using a cotton swab. Wring it out, then gently swab the inside, avoiding pushing any debris further in. Using a Toothpick: Clear out debris by gently loosening with a toothpick. Avoid harsh strokes to prevent damage. Using Compressed Air: To remove hidden debris, try an air compressor after loosening with a toothpick. Be gentle to avoid any damage to the port. Precautions And Safety Measures Cleaning your iPhone’s charging port is important, but it’s essential to take precautions to avoid further damage. When attempting to clean the charging port at home, ensure that you use safe cleaning practices. Avoid using sharp objects like toothpicks to prevent scratches or damage to the port. Instead, use a soft brush or a can of compressed air to remove debris gently. Additionally, refrain from using excessive force when cleaning to prevent any internal damage to the port. Always ensure that the iPhone is powered off before attempting to clean the charging port to avoid any electrical mishaps. Safety should always be a top priority when cleaning your iPhone’s charging port. Testing The Connection When it comes to maintaining your iPhone’s charging port, it is important to keep it clean to ensure a reliable connection. A dirty charging port can lead to charging issues and poor performance. Here are some steps you can follow to clean your iPhone charging port at home: Powering Off The Phone Before you start cleaning the charging port, it is essential to power off your iPhone. This will prevent any accidental damage while cleaning the port. Checking For Debris Next, take a close look at the charging port and check for any debris. You can use a flashlight to get a better view. If you spot any dirt, dust, or lint, it’s time to clean it out. Drying The Port Once you have removed any visible debris, it’s important to dry the charging port before turning on your iPhone. You can use a soft cloth or gently blow air into the port to remove any moisture. By following these simple steps, you can easily clean your iPhone charging port at home and ensure a reliable connection for charging your device. Additional Tips And Resources Using Soft Cloth: When it comes to cleaning the iPhone charging port, one of the safest methods is to use a soft cloth. This will help to remove any dust or debris that might be clogging the port. Simply take a clean, dry cloth and gently wipe the inside of the port, being careful not to apply too much pressure. Safest Way to Clean with Compressed Air: Another effective method is to use compressed air to clean the charging port. This can help to dislodge any stubborn dirt or particles that the cloth might have missed. Hold the can of compressed air upright and give the port a few short blasts to clear away any immediate dust. Using Toothpick: If you notice that the port is still not clean, you can try using a toothpick to remove any remaining debris. Gently insert the toothpick into the port and carefully loosen any dirt or grime. Be sure to exercise caution and not push too hard or damage the port. Remember: It is important to clean the charging port regularly to ensure the proper functioning of your iPhone. By following these tips and using the appropriate tools, you can keep your charging port clean and maintain the longevity of your device. Credit: www.gophermods.com Credit: www.housebeautiful.com Frequently Asked Questions On How To Clean Iphone Charging Port At Home How Do I Clean My Iphone Charging Port? To clean your iPhone charging port, use a cotton swab dipped in rubbing alcohol. Gently swab inside, avoiding pushing debris further in. Avoid too much liquid on the swab. Can I Use Rubbing Alcohol To Clean My Iphone Charging Port? Yes, you can clean your iPhone charging port with rubbing alcohol using a cotton swab. Can You Use A Toothpick To Clean Iphone Charging Port? Yes, you can use a toothpick to gently remove debris from the iPhone charging port. Be cautious not to push debris further in. It’s best to do this carefully. How Do I Clean My Iphone Charging Port With A Toothbrush? To clean your iPhone charging port with a toothbrush, gently push the bristles into the port and brush away debris. Be careful not to push too hard or stroke too aggressively to avoid damaging the port. Conclusion Maintaining a clean iPhone charging port is essential for its longevity and smooth functioning. By following these simple steps, you can easily clean your iPhone charging port at home. Regular cleaning can prevent damage and ensure efficient charging.